Saturday, September 08, 2012

Rosie Swirl


This is a one tip cake! All I did was evenly frost the top and edges and made a vertical swirl motion with a drop flower tip from bottom to top.

This was a chocolate 4” and 6” two layer cake. The shining star of this cake was the frosting! I made a traditional buttercream frosting and added a hint of cherry vanilla flavoring… YUM!!!! I also coulnd’t get over how gorgeous the frosting color turned out. I was really pleased with the final product. 

Happy 4th!


Instead of a traditional flag cake to celebrate our nations birthday, I decided to take a little inspiration from some of my favorite summer fruits. This berry flavored cake is frosted in a vanilla pudding coolwhip frosting and covered with berry almond flowers. The flowers are extremely easy and a great way to add a festive touch to your 4th. Just alternate between the red and blue berries you have chosen use and add slivered almonds about the berries to create pedals. 

Saturday, June 23, 2012

Lemon Poppy Seed "Cake-Cream" Sandwiches


These delicious "cake-cream" sandwiches are made with lemon poppy seed muffin mix and a honey butter cream filling. Check out my how to page to see how you can make them too!

Honey Bee


A honey cake for one of the sweetest little bees I know. This was a vanilla almond cake with a honey butter cream frosting. I used an 8'' pan and let the center bake to a mound. Usually I would cut off the mounded top and level the cake off, but for this cake I left it to give the beehive the dome effect. 

To create the beehive,  I first colored a tiny bit of frosting black and frosted a small section of the side of the cake. I then used a number 12 tip and piped a yellow ribbon of frosting in a circular motion all the way up and around the cake. I used the same tip to pipe the bees, I just added a little bit more yellow dye. To complete the bees I piped tiny black stripes and eyes with a number 3 tip. And last but not least I used a number 102 tip for the wings and flowers. 

Happy Birthday Day Natalie!


Saturday, May 19, 2012


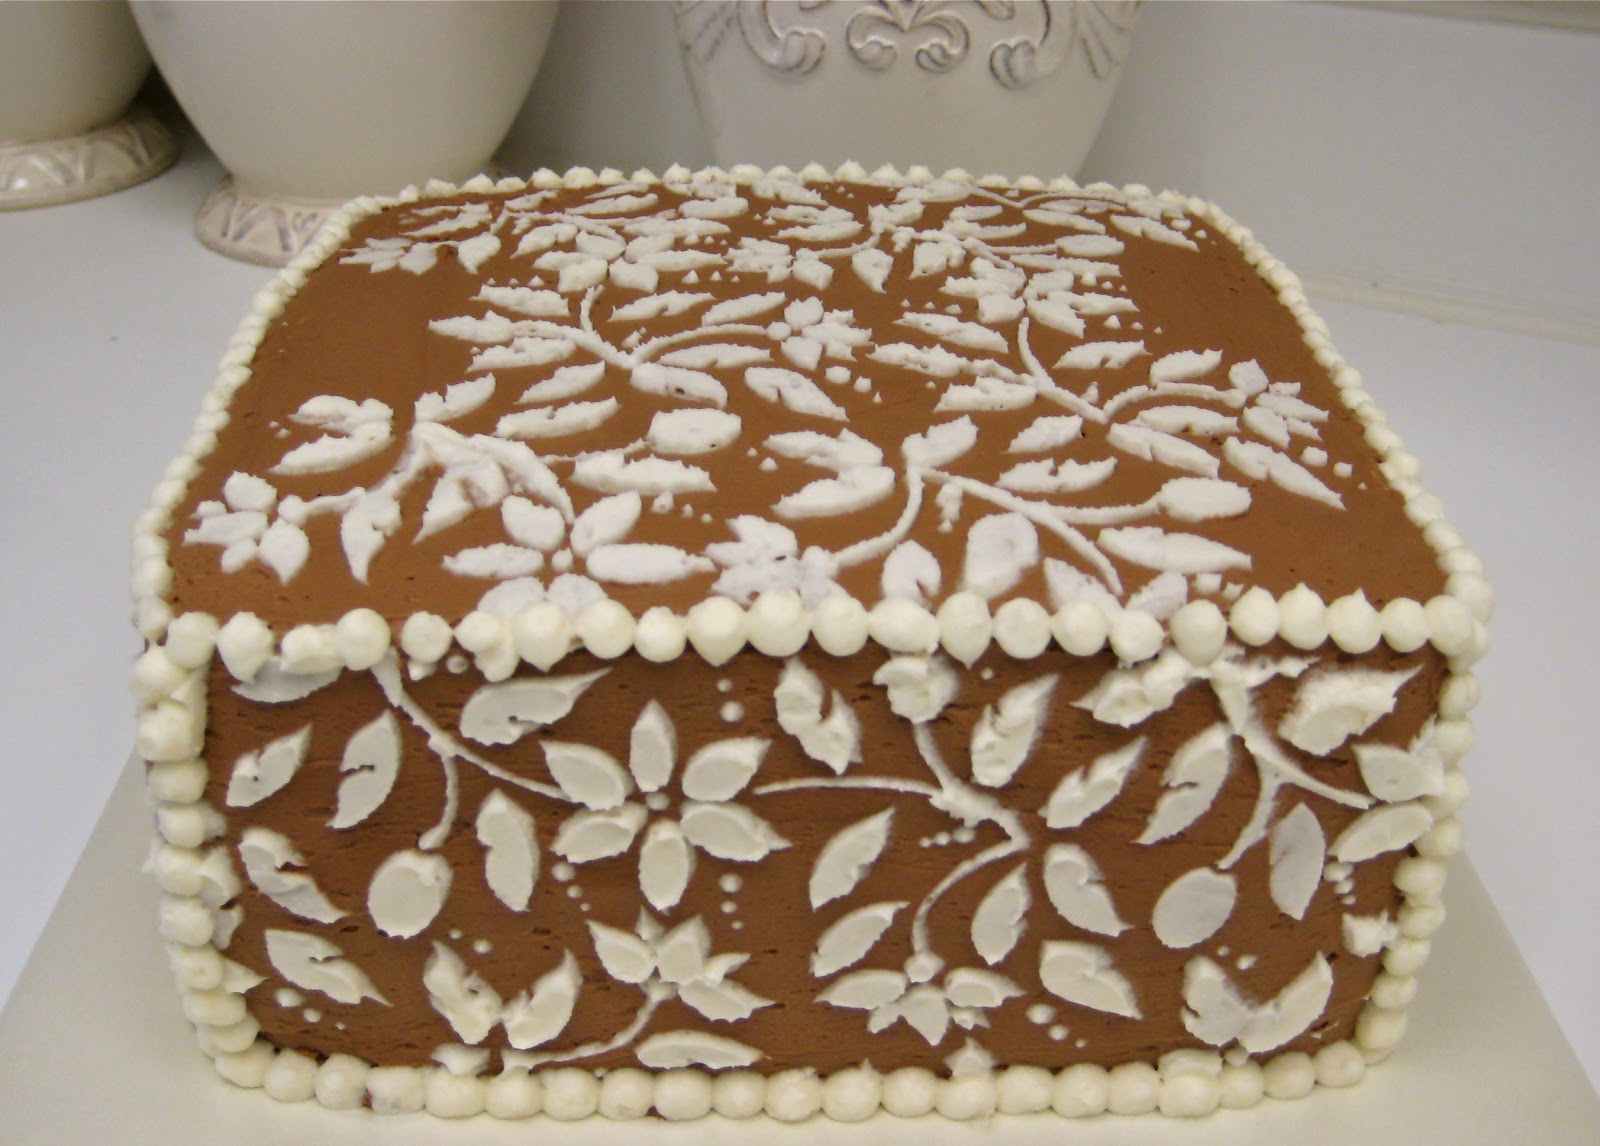
This is a Devil's Food Chocolate cake with a chocolate almond frosting. I started by filling and frosting the layers and letting the frosting dry and become slightly hard. I then gently pressed the stencil against the side of the cake and spread the cream colored frosting on top. To get clean lines and avoid the frosting seeping under the stencil in all directions, I started the dollop of frosting at the left and spread in a left to right motion until I had applied the desired amount. Then ever so carefully pulled the stencil off leaving the design on the side of the cake. To add the finishing touch, I framed each side of the cake in a pearled boarder.

When I delivered the cake I was walking down one of the quaint streets of Balboa Island and two different couples stopped to admire the cake. I just got my business cards in this week and my friend Lauren, who was with me, said, "Here have one of her business cards." We joked that I should promote my business by walking up and down the streets with cake and business cards in had. Spreading the news on Lolo's Layers one slice at a time.

Buttercream Ruffle


This was a two tiered chocolate cake filled with carmel filling and iced in a two tone white and pink buttercream. I separated the icing into to colors, 2/3 pure white and 1/3 a soft pink color. I added both colors of frosting in the piping bag to create the two toned effect. I used a 2D drop flower tip to create the ruffle design.

The flower faceted to the side is actually a tulip. I gently bend the pedal back so that the flower would fan out against the cake. I love that this exposed the beautiful colors on the inside of the pedal.

Lisa Ann was so surprised and excited about her pink ruffle cake, and I think it's fits her personality perfectly.

Happy Birthday Lisa Ann!

Thursday, April 12, 2012

Painting the Roses Red


Adriana was Queen for a day as we celebrated her wedding at a surprise Wonderland Tea Party. This Alice theme wedding cake was one of my first using fondant for more than just an accent. I learned a lot about fondant and why so many people love to work with it to get just the right feel for their cake.

I started with one giant ball of white fondant and individually colored smaller sections green, red, and yellow.  To color fondant, you add a drop or two of gel coloring and kneed until you have a smooth distribution of the color you are looking for. 

For the leaves I rolled out a ball of fondant about the size of my fist to 1/16th of an inch. I then used a leaf cookie cutter to cut out the individual leaves. I let the leaves dry over night, which is not necessary but helps break up the work. I then placed the leaves around the cake in sporadic patterns and in three layers to give it the proper texture and depth. 


The roses are handmade out of fondant as well. The cake is covered in "painted" red roses, the dreaded white rose, and toned roses that are in the process of being painted to be presentable for the Red Queen. I made the roses different shapes and sizes and scattered them round the topiary cake.  For the last royal touch I placed a fondant heart crown on top. 

I am so glad there was a royal occasion so I could paint the roses red!